Sushi is one of the most beloved and versatile dishes in Japanese cuisine. Whether it’s served as nigiri, sashimi, or wrapped in seaweed as maki rolls, sushi is enjoyed worldwide for its fresh flavors and unique textures. But the good news is, you don’t have to go to a restaurant to enjoy it! Making sushi at home is surprisingly easy and can be a fun activity for friends and family.
In this article, we’ll walk you through how to make sushi at home using simple ingredients, as well as a few tips and tricks to help you roll like a pro. So roll up your sleeves, and let’s dive into the world of homemade sushi!
What You’ll Need: The Basic Ingredients
The beauty of making sushi at home is that you can customize your rolls with ingredients that suit your tastes. However, there are a few essentials you’ll need to get started:
1. Sushi Rice
Sushi rice is the backbone of any sushi roll. It’s different from regular rice due to its stickiness, which helps hold the rolls together. Sushi rice is seasoned with a mixture of rice vinegar, sugar, and salt to give it the signature tangy flavor.
What to Buy: Look for short-grain sushi rice or Japanese rice. Avoid long-grain rice, as it doesn’t have the right texture.
How to Cook It:
- Rinse the rice thoroughly until the water runs clear.
- Cook according to the package instructions (generally a 1:1 ratio of rice to water).
- Once cooked, gently fold in a mixture of rice vinegar, sugar, and salt while the rice is still warm, and let it cool to room temperature.
2. Nori (Seaweed Sheets)
Nori is the dried seaweed used to wrap sushi rolls. It’s crispy, savory, and adds a nice crunch to your sushi. Make sure you buy nori sheets that are intended for sushi-making, which are typically darker green and more flavorful than the kind used for snacking.
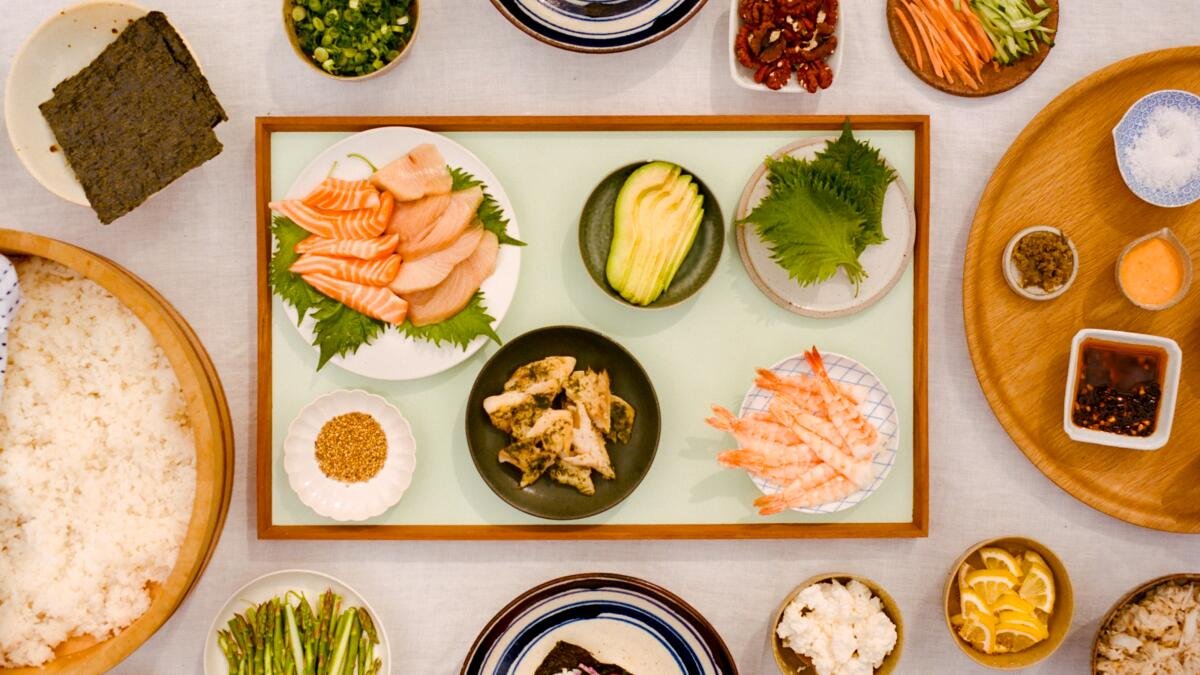
3. Fillings
The fillings are where you can get creative. Here are some common and easy-to-find options:
- Fresh Fish: For traditional sushi, fresh fish like salmon or tuna is often used. Make sure to buy sushi-grade fish from a reputable source.
- Vegetables: Cucumber, avocado, and carrot are popular choices for adding crunch and creaminess.
- Cooked Proteins: If you’re not into raw fish, shrimp (ebi), crab sticks, or cooked salmon are great alternatives.
4. Rice Vinegar, Sugar, and Salt (for Seasoning the Rice)
The seasoning mixture of rice vinegar, sugar, and salt is what transforms regular rice into sushi rice. You’ll need this to give the rice its signature tang.
Basic Sushi Rolling Equipment
- Bamboo Sushi Mat (Makisu): This mat helps you roll the sushi evenly and tightly. It’s inexpensive and can be found in most grocery stores or online.
- Sharp Knife: A sharp knife is essential to slice your rolls cleanly and prevent the rice from sticking to the blade.
- Bowl of Water: Keep a bowl of water nearby to dip your fingers in while handling the sticky rice to prevent it from sticking to your hands.
Step-by-Step Guide to Rolling Your Own Sushi
Step 1: Prepare the Rice
As mentioned earlier, cooking and seasoning the rice is the first and most important step. Once the rice has cooled to room temperature, it should be slightly sticky but not too wet.
Step 2: Set Up Your Rolling Station
Place a sheet of nori (shiny side down) on the bamboo mat. You’ll want the longer edge of the nori to be horizontal.
Step 3: Spread the Rice
Dip your fingers in the bowl of water to prevent sticking, then take a small handful of sushi rice and spread it evenly over the nori. Leave about an inch of space at the top edge of the nori (this is where you’ll seal the roll).
Tip: Use a gentle, pressing motion to spread the rice out. Avoid pressing too hard, or you’ll squash the rice and make it too compact.
Step 4: Add the Fillings
Now it’s time to add your fillings! Place your choice of fish, veggies, or other fillings in a neat line along the center of the rice.
Tip: Don’t overfill your sushi roll—about 2-3 pieces of fish or vegetables should be enough. Too much filling will make it hard to roll tightly.
Step 5: Roll the Sushi
This is the fun part! Starting from the edge closest to you, carefully lift the bamboo mat and the nori, rolling it over the fillings. Use your thumbs to gently push the filling in as you roll. The mat will help guide the roll, and you should aim to keep it tight but not too tight, so the ingredients don’t spill out.
When you reach the top edge of the nori (the side with no rice), moisten it with a little water to seal the roll shut.
Step 6: Slice the Sushi
Once your roll is sealed, remove it from the bamboo mat and use a sharp knife to slice it into bite-sized pieces. Clean the knife between each cut to ensure clean, smooth slices.
Tip: For a clean cut, use a wet knife to prevent the rice from sticking.
Types of Sushi Rolls to Try at Home
1. Classic California Roll (Vegan or with Crab)
The California roll is one of the most popular sushi rolls. It typically includes imitation crab, avocado, and cucumber. For a vegan version, substitute the crab with avocado or tofu.
2. Rainbow Roll
This roll is made with sushi rice, nori, and a variety of colorful fish on top. You can use a mix of tuna, salmon, yellowtail, or avocado for a vibrant and flavorful roll.
3. Spicy Tuna Roll
If you like a bit of heat, try the spicy tuna roll. The tuna is mixed with spicy mayo, a combination of sriracha and vegan mayo or regular mayo. It’s deliciously spicy and creamy!
4. Veggie Roll
For a completely plant-based option, use cucumber, avocado, carrots, and pickled radish as your filling. These rolls are fresh and light, with a satisfying crunch.
5. Tempura Roll
Add a little crunch with a tempura roll. Use tempura-battered shrimp or vegetables and wrap them in nori with rice and avocado for a delicious, crispy roll.
Tips for Making Sushi at Home
- Use Fresh Ingredients: The quality of your ingredients will make a huge difference. If you’re using fish, be sure it’s sushi-grade. If you’re going vegan, fresh produce will give your rolls great flavor and texture.
- Experiment with Fillings: Don’t be afraid to get creative with your rolls. You can add cream cheese, spicy mayo, or even pickled ginger for an extra flavor kick.
- Practice Makes Perfect: Rolling sushi takes practice, so don’t be discouraged if your first few rolls don’t turn out perfectly. The more you make, the better you’ll get at it!
Conclusion
Making sushi at home can be a fun and rewarding experience, and it’s easier than you might think. With a few simple ingredients, you can create your own sushi rolls that are just as tasty (if not more!) than what you’d find at a restaurant. Whether you prefer traditional rolls with raw fish or creative veggie rolls, the possibilities are endless.
So gather your ingredients, roll up your sleeves, and start making your very own sushi creations in the comfort of your own kitchen!